
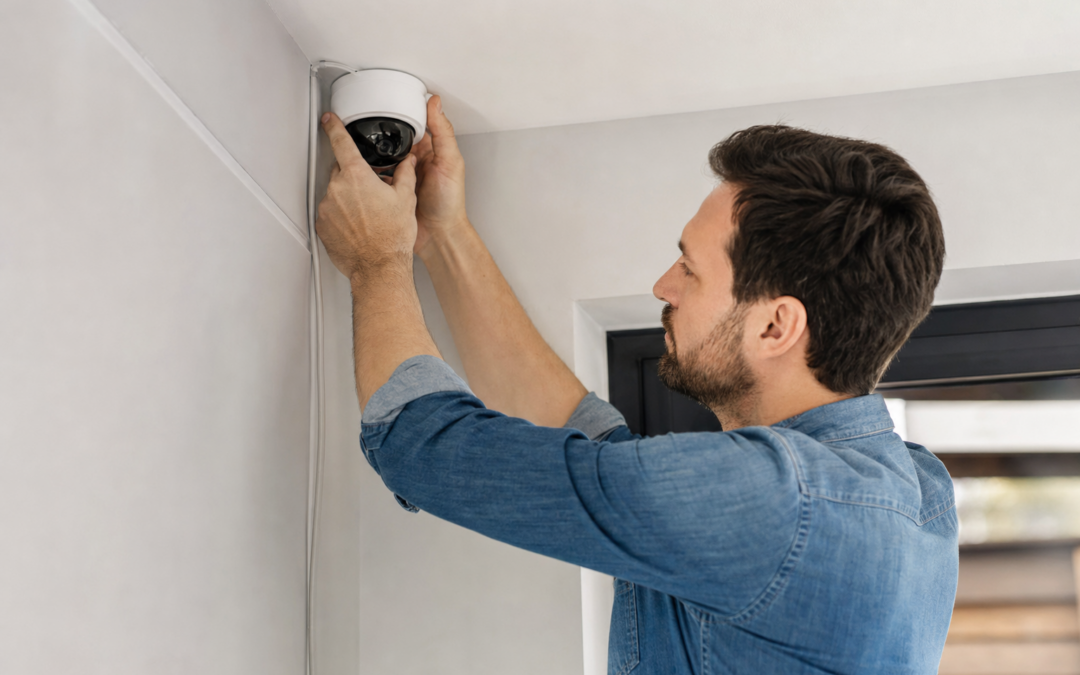
Thinking about upgrading your home’s security with cameras you can truly rely on? DIY PoE (Power over Ethernet) camera setups are increasingly popular among homeowners who want stable, high-quality surveillance without the headaches of weak WiFi signals or frequent battery changes. Understanding the basics of PoE camera switches and cables is crucial for anyone considering a wired security solution—whether you’re a tech enthusiast or a first-time installer.
This in-depth guide breaks down what PoE is, how it compares to WiFi cameras, and what you need to know about switches and cabling for a successful home installation. From understanding technical jargon to running cables and choosing the right gear, you’ll find practical, step-by-step information to help you secure your property with confidence.
What Is Power over Ethernet (PoE)?
Power over Ethernet, or PoE, is a technology that enables a single Ethernet cable to carry both data and electrical power to devices such as IP cameras, wireless access points, and VoIP phones. For home security, this means you can install cameras in places without needing a nearby power outlet—just run one cable from your PoE switch to the camera, and you’re set.
Compared to traditional setups where each camera needs a separate power source, PoE simplifies wiring, reduces clutter, and enables more flexible camera placement. That’s why PoE cameras are a favorite for those who want professional-grade reliability in their DIY installations.
PoE vs. WiFi Cameras: Key Differences
One of the first decisions you’ll face is whether to go with PoE or WiFi cameras. Each has its pros and cons, but for many homeowners, PoE offers several critical advantages:
- Reliability: PoE cameras maintain a steady connection and are less prone to interference or drops compared to WiFi models, which can suffer from signal issues—especially in larger homes or areas with thick walls.
- Power Supply: With PoE, your cameras get power through the Ethernet cable itself. No more worrying about battery changes or running extension cords outside.
- Bandwidth: Wired connections typically support higher video resolutions and frame rates, making PoE cameras ideal for detailed surveillance footage.
- Installation Location: WiFi cameras are limited by the range of your wireless router, while PoE cameras can be placed anywhere you can run a cable—even 100 meters (328 feet) away from your switch.
- Ongoing Maintenance: WiFi cameras may require regular battery swaps and troubleshooting, whereas PoE cameras, once installed, often need little attention.
That said, WiFi cameras can be easier to set up for renters or those unable to run cables. If you’re interested in comparing top-rated wireless models, check out our Alarms & Smart Security hub for product reviews and guides.

Blink Outdoor 4 – Wireless smart security camera Review — An editorial look at this Blink option for categories — specs first, marketing second. Key figures include 4 , 53, 5 .
Understanding PoE Switches
The heart of any PoE camera system is the PoE switch. This device connects to your home network (typically your router or modem) and provides both power and data to your cameras using Ethernet cables. Here are the basics you need to know:
- Port Count: PoE switches come in various sizes, typically 4, 8, 16, or 24 ports. Choose a switch with at least as many ports as cameras you plan to install, and consider a few extra for future expansion.
- PoE Standards: The two main types are IEEE 802.3af (PoE) and IEEE 802.3at (PoE+). PoE+ delivers more power per port (up to 30W) and is recommended for cameras with features like pan/tilt/zoom or built-in heaters.
- Managed vs. Unmanaged: Managed switches offer advanced features like traffic segmentation and remote monitoring but may be overkill for basic home installs. Unmanaged switches are simple plug-and-play solutions ideal for most DIYers.
- Uplink Ports: These are dedicated ports used to connect your PoE switch to your router or another network device, ensuring all your cameras are accessible for remote viewing and recording.
When shopping, always check the total power budget (the maximum wattage the switch can supply to all devices) to ensure it matches your camera lineup.

2026 Enhanced 2K UHD Security Cameras Wireless Outdoor Review — Practical bullet cameras from realhide, summarized from hub features and listed measurements. Key figures include 24, 7, 2.13 .
Ethernet Cable Types for PoE Cameras
The choice of Ethernet cable is critical for a solid PoE camera installation. Here’s what you need to know about cable types and ratings:
- Cat5e: Suitable for most home PoE camera systems, supporting speeds up to 1 Gbps and lengths up to 100 meters (328 feet).
- Cat6: Offers better performance, especially for higher bandwidth setups or runs near the maximum distance. Handles up to 10 Gbps at shorter lengths.
- Cat6a/Cat7: Overkill for most home installs but useful for future-proofing or professional-grade systems.
- Shielded (STP) vs. Unshielded (UTP): Shielded cables offer extra protection against electrical interference, useful if you’re running cables near power lines or in high-interference areas. For most homes, unshielded Cat5e or Cat6 is sufficient.
- Outdoor/Direct Burial: If running cables outside or underground, choose cables rated for outdoor use—these have UV-resistant jackets and better moisture protection.
Label your cables during installation and test each run before mounting cameras to prevent troubleshooting headaches.
Planning Your PoE Camera Layout
Before drilling holes or pulling cable, take time to plan your camera placement and cable runs. Here’s a step-by-step approach:
- Identify Coverage Areas: Walk around your property and note key entry points, driveways, and blind spots. Sketch a rough map showing where each camera will go.
- Measure Cable Runs: Estimate the distance from your switch (often installed near your router or in a utility room) to each camera location. Add extra length for slack, corners, and routing around obstacles.
- Consider Switch Location: The closer your switch is to the center of your camera network, the shorter your cable runs will be. This can improve performance and reduce installation time.
- Plan for Future Expansion: Leave extra cable at each camera location and consider running spare cables for future upgrades or additional cameras.
Careful planning upfront saves time, reduces wasted materials, and helps avoid common mistakes like running out of cable or missing important coverage spots.
Running and Securing Ethernet Cables
Proper cable installation is essential for both performance and aesthetics. Here are some practical tips for DIYers:
- Use Cable Clips or Raceways: Secure cables neatly along walls, baseboards, or ceilings. Avoid stapling directly into the cable, as this can damage the internal wires.
- Avoid Sharp Bends: Ethernet cables should not be bent sharply; keep curves gentle to prevent signal loss or breakage.
- Weatherproof Outdoor Runs: For exterior installs, use weatherproof junction boxes and seal entry points with silicone caulk to keep out moisture and pests.
- Label Both Ends: Mark each cable at the switch and camera end to make troubleshooting and upgrades easier in the future.
Consider using fish tape, cable pullers, or flexible drill bits for getting cables through walls, attics, or crawl spaces. Take your time—neat work now pays off in reliability later.
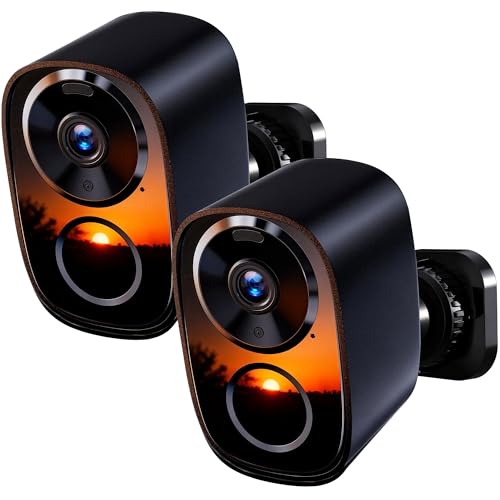
2026 Upgraded 2K Security Cameras Wireless Outdoor ( ) Review — Practical bullet cameras from realhide, summarized from hub features and listed measurements. Key figures include 3, 1 , 5 .
Connecting and Configuring Your PoE Cameras
With cables and switch in place, it’s time to connect your cameras:
- Plug one end of each Ethernet cable into a PoE-enabled port on your switch and the other end into your camera’s network port.
- Once connected, most cameras will power up automatically—look for indicator lights or listen for startup chimes.
- Use the camera manufacturer’s app or web interface to assign IP addresses, configure recording schedules, and adjust settings like motion detection zones or image quality.
- If using a Network Video Recorder (NVR), connect it to the same network. Some NVRs have built-in PoE ports, further simplifying setup.
Refer to your product manuals for specific configuration steps. Many modern PoE cameras support “plug and play” discovery, making initial setup easy even for beginners.
Troubleshooting Common PoE Camera Issues
Even well-planned installations can hit snags. Here’s how to tackle common problems:
- Camera Not Powering Up: Check that you’re using a PoE port (not a standard Ethernet port) and that your switch’s total power budget isn’t exceeded.
- No Video Feed: Confirm your camera is assigned the correct IP address and is on the same subnet as your viewing device or NVR.
- Intermittent Video or Dropouts: Test your cable for continuity and replace any damaged runs. Avoid running cables parallel to high-voltage power lines.
- Poor Night Vision or Image Quality: Adjust camera settings, clean the lens, and ensure your camera is receiving sufficient power (especially for IR features).
If problems persist, try connecting the camera directly to the switch with a short patch cable to rule out cable issues. Upgrade firmware as needed, and consult manufacturer support forums for model-specific tips.
Tips for a Clean and Professional Install
Want your DIY PoE camera system to look as good as it works? A tidy installation not only enhances reliability but also avoids drawing unwanted attention. Here are some best practices:
- Use Concealed Cable Paths: Whenever possible, run cables behind baseboards, in attics, or through crawl spaces for a hidden look.
- Paintable Cable Raceways: These can blend in with your home’s trim and protect cables from damage.
- Group Camera Cables: Bundle cables together using Velcro straps or cable ties to keep your switch area organized.
- Document Your Work: Take photos of cable runs and label everything. This makes troubleshooting and upgrades easier in the future.
Taking the extra time to tidy up your installation pays dividends in long-term usability and home value.
How to Expand or Upgrade Your PoE System
One of the big advantages of PoE camera setups is scalability. As your needs grow, you can easily add more cameras or upgrade existing ones:
- Adding Cameras: Plug new cameras into unused switch ports and run cables as before. If your switch is full, daisy-chain another PoE switch or upgrade to a higher-port model.
- Upgrading Cameras: Swap out older models for higher-resolution or feature-rich cameras (like PTZ or audio-enabled units) without needing new power lines.
- Expanding Storage: Consider adding or upgrading a Network Video Recorder (NVR) or using a NAS (Network Attached Storage) system for longer video retention.
If you anticipate future expansion, install extra cables and choose a switch with more ports than you currently need.
Safety and Security Considerations
While PoE cameras boost your home’s safety, it’s important to secure your network and equipment:
- Change Default Passwords: Always update login credentials on cameras and NVRs to prevent unauthorized access.
- Network Segmentation: If possible, use VLANs (Virtual LANs) to isolate your security system from other home devices.
- Keep Firmware Updated: Regularly check for and install firmware updates to patch security vulnerabilities.
- Physical Security: Mount cameras out of easy reach and use tamper-resistant hardware for outdoor installations.
Following these steps helps you get the most from your investment while keeping your footage private and your system reliable.

2026 Upgraded 2K Security Cameras Wireless Outdoor Review — An editorial look at this HITELLARCAM option for bullet cameras — specs first, marketing second. Key figures include 2026, 2, 24.
Final Thoughts: DIY PoE Camera Installs Made Simple
Setting up a PoE camera system is well within reach for most DIYers, and the benefits over WiFi cameras—especially in terms of reliability, video quality, and low maintenance—are compelling. By understanding the basics of PoE switches, cable types, and installation best practices, you’ll be well-equipped to design a system that fits your home’s unique needs.
As you plan your security upgrade, use our guides and research-based reviews to help choose the right cameras and networking gear for your property. Whether you’re securing a single entryway or blanketing your entire yard, a thoughtfully installed PoE setup provides peace of mind and professional-grade results for years to come.
For more advice, product reviews, and in-depth security tips, explore our Alarms & Smart Security section.
PoE Camera Installation Checklist
Before you start drilling holes or running cables, use this checklist to make sure your PoE camera installation goes smoothly:
- Site Survey: Walk around your property and identify the areas you want to monitor. Look for optimal mounting spots with clear views and minimal obstructions.
- Camera Placement: Ensure each camera covers its intended area without overlap or blind spots. Consider lighting conditions, potential glare, and nighttime visibility.
- PoE Switch Selection: Verify your switch has enough ports and the correct power output for your chosen cameras.
- Cable Route Planning: Plan cable paths from each camera back to the PoE switch. Avoid sharp bends, high heat, and interference sources (like fluorescent lights or heavy appliances).
- Ethernet Cable Type: Choose at least Cat5e for standard PoE cameras; use Cat6 or higher for longer runs or higher bandwidth needs.
- Weatherproofing: Use weatherproof junction boxes and cable grommets for outdoor cameras to prevent water ingress.
- Network Setup: Assign clear labels to each cable and camera. Pre-configure your NVR (network video recorder) or storage solution if needed.
- Testing: Test each cable and camera before final installation to confirm power and video feed.
- Documentation: Take photos of cable runs and connections for future reference.
Common Mistakes to Avoid With PoE Camera Systems
Even seasoned DIYers can make errors when installing PoE camera systems. Watch out for these frequent pitfalls to save yourself time and frustration:
- Using the Wrong Cable Type: Low-quality or incorrect Ethernet cables (like old Cat5) can cause signal loss or insufficient power delivery, especially on long runs.
- Exceeding Maximum Cable Length: Ethernet cables are generally limited to 100 meters (328 feet) for PoE. Longer runs risk voltage drop and unreliable performance.
- Ignoring Power Budget: Overloading your PoE switch by connecting more cameras than it can power may result in cameras intermittently shutting down or not turning on at all.
- Improper Weatherproofing: Outdoor connections exposed to the elements can corrode or short-circuit without proper sealing.
- Forgetting Surge Protection: Cameras and switches can be vulnerable to power surges, especially when mounted outdoors. Install surge protectors or use switches with built-in protection.
- Poor Network Security: Not changing default passwords or leaving cameras exposed to the internet can make your system a target for hackers.
- Insufficient Testing: Failing to test each component before finalizing the installation can make troubleshooting much harder later.
Double-check each step and don’t rush the planning phase—a little extra effort upfront can save hours of headaches later.
Maintaining Your PoE Camera System
Once your cameras are up and running, ongoing maintenance ensures your system remains reliable and secure. Here’s how to keep your PoE camera setup in top shape:
- Regular Cleaning: Wipe camera lenses with a microfiber cloth every few months to prevent dust, spider webs, or water spots from obscuring the view.
- Firmware Updates: Periodically check for and install firmware updates from your camera and switch manufacturers to patch security vulnerabilities and improve performance.
- Cable Inspection: Look over exterior cable runs annually for signs of damage from weather, animals, or gardening tools.
- Connection Checks: Confirm all connectors are secure and free from corrosion, especially outdoors.
- System Testing: Review camera feeds and recording quality every few months to catch any degraded video or connection issues early.
- Storage Management: If using an NVR or local storage, monitor available space and archive or delete old footage as needed.
- Network Security: Change passwords periodically and enable multi-factor authentication if available.
Proactive maintenance not only extends the life of your equipment but also ensures your security system is ready when you need it most.
PoE Camera & Cable FAQ
Can I use any Ethernet cable for PoE cameras?
Not all Ethernet cables are created equal. For most PoE cameras, Cat5e is the minimum recommended standard. For longer runs or cameras with higher bandwidth requirements (such as 4K models), Cat6 or Cat6a cables are preferred due to their improved shielding and data rates.
How many cameras can I connect to a PoE switch?
This depends on both the number of ports and the total power budget of your switch. For example, an 8-port PoE switch may only be able to power six cameras if each camera draws a lot of power and the switch’s total output is limited. Always check both specs and allow a buffer for future expansion.
Do I need a special router for PoE cameras?
No special router is required, but your PoE switch will need to connect to your home network (usually via the router) for remote access, notifications, or cloud storage. The switch itself handles the power and data for the cameras.
Is it safe to run PoE cables outdoors?
Yes, as long as you use outdoor-rated Ethernet cables and weatherproof enclosures at connection points. Avoid direct sunlight where possible, and keep cables off the ground to reduce exposure to moisture and pests.
Can I mix PoE and non-PoE devices on the same switch?
Most PoE switches can detect whether a device needs power and only supply it if needed. This means you can usually plug in non-PoE devices (like regular computers or printers) without worry, but always check your switch’s documentation first.
What happens if a camera fails or loses signal?
If a PoE camera goes offline, first check the cable for damage and ensure it’s securely connected at both ends. If the cable is fine, try rebooting the switch and camera. Persistent issues may indicate a failed camera or switch port, both of which can be replaced individually.
How can I access my PoE cameras remotely?
Most modern PoE camera systems offer remote viewing through a mobile app or web interface. You’ll need to configure your router for secure remote access (such as port forwarding or using a cloud relay service). Always use strong passwords and enable encryption to protect your feed.
Final Tips for a Trouble-Free PoE Camera Setup
- Label everything: Labeling cables and ports now will save you time if you ever need to troubleshoot or expand your system later.
- Plan for growth: Choose a PoE switch with a few extra ports and a higher power budget than you currently need.
- Document your setup: Take notes and photos of cable paths, switch connections, and camera locations so you can easily revisit or modify your installation in the future.
- Consult local regulations: Check if there are any restrictions or privacy rules regarding camera placement in your area.
By following these guidelines, you’ll set yourself up for a robust, reliable home security system that’s easy to maintain and expand as your needs evolve.
Our content is researched and drafted with AI assistance and reviewed by our team. Product details come from published specs, manufacturer information and owner reviews.