
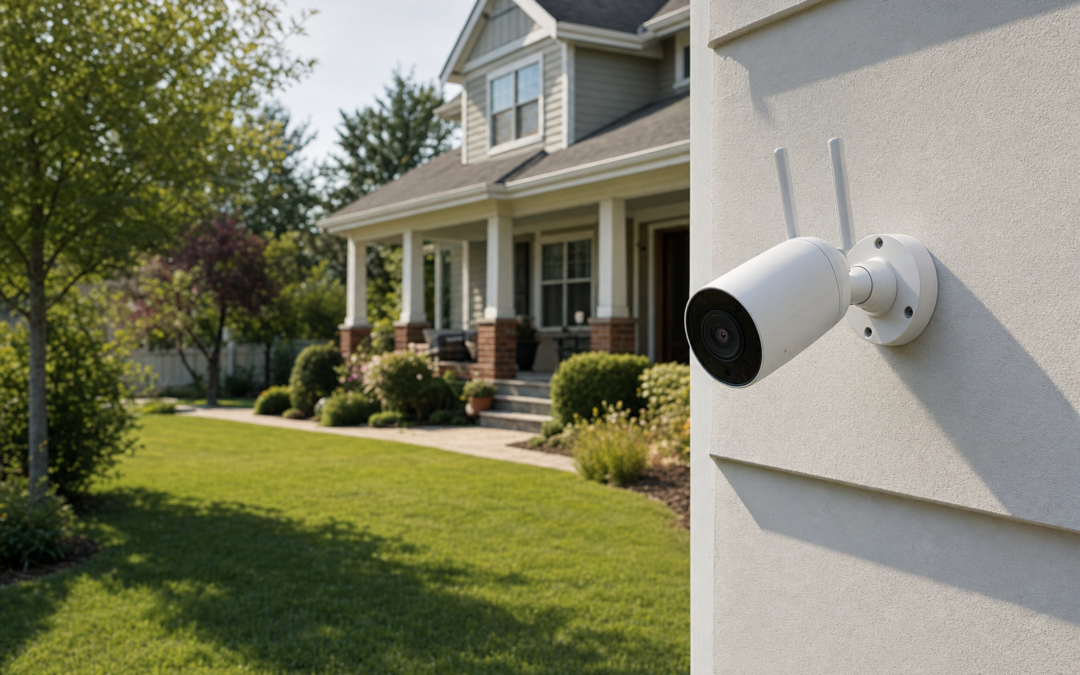
Securing your property’s perimeter is one of the most effective ways to deter intruders and keep your home and family safe. For most suburban lots, a thoughtful camera coverage plan delivers peace of mind and reliable evidence in the event of suspicious activity. Whether you’re concerned about hidden alleys, blind corners, or the approach to your driveway, mapping out your outdoor camera locations can make a world of difference.
In this guide, we’ll walk through practical steps to plan, position, and optimize perimeter cameras for typical suburban properties. We’ll cover the best practices for mapping coverage, choosing the right camera types, handling tricky corners and alleys, and integrating your setup with broader outdoor security strategies.
Why Perimeter Camera Coverage Matters
While indoor security often gets the spotlight, the perimeter is your first line of defense. Most break-ins and trespassing incidents start at the edges of your lot—along fences, side yards, and driveways. Effective perimeter camera coverage:
- Deters would-be intruders—visible cameras can make your property a less attractive target.
- Provides early alerts—motion detection at the boundaries buys you time to react.
- Captures crucial evidence—high-quality footage of faces, vehicles, and suspicious activity.
- Monitors vulnerable areas—like alleys, corners, and less visible entry points.
For a comprehensive approach, it’s smart to coordinate your camera setup with other outdoor security measures like lighting, fencing, and landscaping.
Understanding Your Suburban Lot Layout
Every suburban property is unique, but most share common features: a front yard, backyard, driveway, and fenced boundaries. Before buying or installing cameras, take time to:
- Sketch a simple map—showing your home, lot boundaries, gates, and any outbuildings.
- Mark high-traffic and vulnerable zones—side gates, alleyways, secluded corners, and spots not visible from windows or the street.
- Note sightlines and obstructions—trees, sheds, vehicles, and fences can block or distort camera views.
This bird’s-eye view helps you identify where cameras are most needed and avoid overlap or blind spots.
Key Coverage Goals for Perimeter Cameras
To maximize your investment and security, your perimeter camera plan should aim for:
- Full boundary monitoring—every foot of fence, wall, or open edge visible to at least one camera.
- Critical entry point coverage—front and back gates, driveway, garage doors, and any side entrances.
- Corner and alley visibility—no easy-to-hide spots for intruders to approach unseen.
- Clear identification zones—footage that can capture faces and license plates, not just movement.
- Redundancy in key areas—overlapping views for high-risk spots, so no single camera failure leaves you blind.
Types of Outdoor Security Cameras for the Perimeter
Not all cameras are created equal—your perimeter plan may benefit from a mix of camera types. The most common for suburban lots include:
- Bullet cameras—long, cylindrical, and easy to aim at specific zones like fence lines or driveways. Highly visible and often weather-resistant.
- Dome cameras—less obtrusive, with wide-angle coverage that works well for corners and entryways. Harder for intruders to tell where they’re pointed.
- Wireless smart cameras—flexible placement, easy installation, and remote monitoring via smartphone apps. Ideal for spots without easy wiring access.
- PTZ (pan-tilt-zoom) cameras—offer remote control to scan large areas, but usually best for larger lots or high-value properties.
For most suburban homes, a combination of bullet and wireless smart cameras delivers both targeted and flexible coverage.

Blink Outdoor 4 – Wireless smart security camera Review — An editorial look at this Blink option for categories — specs first, marketing second. Key figures include 4 , 53, 5 .
Mapping Your Perimeter Camera Coverage
Start by walking your property with your lot map in hand. Stand at each boundary—front yard, backyard, corners—and look for:
- Places where someone could approach unseen
- Obscured paths, side gates, or “hidden” alleys between houses
- Areas shielded by landscaping, parked cars, or outbuildings
- Potential mounting points: eaves, fence posts, garage corners, sturdy trees
Mark each spot on your map, then plan camera locations so that each vulnerable section is covered. Overlapping fields of view at corners and gates are ideal. Ensure at least one camera covers each main approach route and that side or rear alleys aren’t overlooked.
Corner Coverage: Eliminating Blind Spots
Corners are notorious weak points on suburban lots. A fence or hedge that meets the back of your house creates a “dead zone” where intruders can hide. Here’s how to secure corners effectively:
- Position cameras above the corner—mount on the eaves or a high fence post, angled to watch down both sides of the corner.
- Use wide-angle lenses—a single wide-angle camera (over 90° field of view) can often cover both sides of a corner.
- Consider dome cameras—these can be aimed to see around corners and are less likely to be tampered with.
- Overlap with adjacent cameras—ensure the area is visible from two directions, not just one.
Test your planned angles by holding up your phone or a camera at the intended height and checking the view. Adjust as needed to eliminate shadowed or hidden areas.

2026 Enhanced 2K UHD Security Cameras Wireless Outdoor Review — Practical bullet cameras from realhide, summarized from hub features and listed measurements. Key figures include 24, 7, 2.13 .
Securing Alleys and Side Yards
Many suburban homes have narrow alleys or side yards between houses—a common entry route for burglars. These areas are often shielded from the street and can be hard to monitor. For effective coverage:
- Mount cameras at both ends of the alley—one facing the street, another toward the backyard or side gate.
- Install motion-activated lights—illumination improves camera footage and deters trespassers.
- Choose weather-resistant cameras—alleys get wet, dusty, and hot; look for IP65 or higher ratings.
- Avoid aiming cameras directly at neighbors’ windows—respect privacy and stay compliant with local laws.
Wireless cameras are especially useful here, as they can be installed without running cables the length of the alley.
Driveway and Front Yard Surveillance
Your driveway is a high-traffic area and a favorite target for package thieves and car prowlers. To cover the front of your property:
- Place a camera at the garage or house corner—angled to see the full length of the driveway and front walk.
- Use a camera with night vision and high resolution—to capture details like faces and license plates, even in low light.
- Supplement with a doorbell camera if possible—this covers deliveries and anyone approaching your front door.
- Check local rules about filming public sidewalks—you’re usually allowed to film your property, but don’t point cameras directly at the street for extended distances.
Test camera placement by parking your car in the driveway and ensuring the entire vehicle is in frame from your chosen mounting spot.
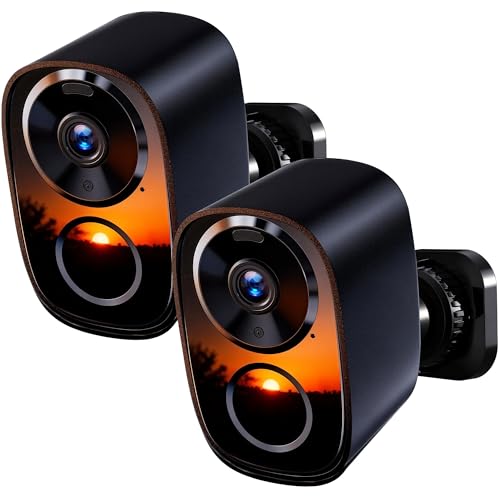
2026 Upgraded 2K Security Cameras Wireless Outdoor ( ) Review — Practical bullet cameras from realhide, summarized from hub features and listed measurements. Key figures include 3, 1 , 5 .
Backyard and Fence Line Monitoring
The backyard is often the most secluded part of a suburban property, making it a common target for break-ins. Ensure your fence line and backyard entrances are covered by:
- Mounting cameras on the back of the house—aimed toward the rear fence and any gates.
- Using high-mounted cameras for a wide view—the higher the placement, the more area you can cover (but avoid aiming so high that you can’t capture faces).
- Placing cameras at fence corners or on outbuildings—like sheds or detached garages, to watch over the farthest parts of the yard.
- Setting up motion alerts—so you’re notified if anyone enters from the rear or sides, especially at night.
Check that landscaping doesn’t block sightlines—trim shrubs and trees that could provide cover or obscure your cameras’ views.
Balancing Coverage and Privacy
While it’s crucial to cover your own property, it’s equally important to respect your neighbors’ privacy. Most states allow you to record video on your own land, but avoid:
- Pointing cameras directly into neighbors’ yards, windows, or driveways
- Recording audio in areas where people expect privacy (audio recording laws vary by state)
- Mounting cameras outside your property lines
When in doubt, consult local ordinances or a qualified installer. Many modern cameras allow you to set “privacy zones” in the app, masking areas outside your property from being recorded.
Optimizing Camera Performance
Even the best camera placement won’t help if your system isn’t set up for reliable, high-quality recording. To get the most out of your perimeter coverage plan:
- Choose cameras with sufficient resolution—2K or higher is best for capturing details at a distance.
- Ensure strong Wi-Fi or wired connections—outdoor cameras far from your router may need range extenders or mesh networks.
- Protect cameras from tampering—mount out of easy reach and use tamper-resistant fasteners where possible.
- Enable cloud or local storage—so footage is saved even if the camera is damaged or stolen.
- Test motion zones and alerts—fine-tune sensitivity to avoid constant false alarms from passing cars or animals.
Regularly clean camera lenses and check for firmware updates to maintain performance and security.

2026 Upgraded 2K Security Cameras Wireless Outdoor Review — An editorial look at this HITELLARCAM option for bullet cameras — specs first, marketing second. Key figures include 2026, 2, 24.
Integrating Cameras with Other Outdoor Security Measures
Perimeter cameras work best as part of a layered outdoor security strategy. Consider adding:
- Motion-activated floodlights to illuminate dark zones and improve camera footage
- Smart alarms or sirens that can trigger when cameras detect motion at odd hours
- Secure fencing and gates to slow intruders and make your cameras more effective
- Visible signage warning that the area is under surveillance, which can deter opportunistic crime
Some smart cameras can integrate with home automation systems, triggering lights or alerts based on activity. This synergy makes your perimeter defense more responsive and effective.
Maintenance and Periodic Review
Your home’s needs will change over time—trees grow, new sheds go up, and neighbors remodel. Make a habit of reviewing your perimeter camera coverage every 6-12 months by:
- Walking the property after dark to look for new blind spots or dark areas
- Checking camera angles and lens clarity after storms or high winds
- Updating motion detection zones as landscaping or traffic patterns evolve
- Testing your alert system and storage to ensure everything works if needed
This proactive approach keeps your security system effective year after year.
Frequently Asked Questions
- How many perimeter cameras do I need? Most suburban lots are well-covered with 4-6 cameras—one for each corner, and extra for driveways or alleys. The exact number depends on your lot size and layout.
- Do I need to wire all my cameras? Not necessarily. Many modern cameras are wireless and battery-powered, but wired cameras are generally more reliable for permanent installations.
- Can I install perimeter cameras myself? Many homeowners can handle basic installation, especially with wireless models. For extensive wired systems or if you’re unsure about placement, consider professional installation.
- What about night vision? Choose cameras with infrared (IR) or color night vision for best results after dark. Pair with outdoor lighting for maximum clarity.
- Is cloud storage necessary? It’s strongly recommended—if a camera is stolen or destroyed, local footage could be lost. Many smart cameras offer affordable cloud plans.
Conclusion: Building a Reliable Perimeter Defense
A thoughtful perimeter camera coverage plan for your suburban lot is a smart investment in your home’s security. By mapping your property, understanding blind spots, and selecting the right mix of cameras, you can deter intruders and gain early warning of suspicious activity.
Remember to revisit your setup regularly, keep your equipment well-maintained, and coordinate cameras with other outdoor security measures. With the right plan, you’ll enjoy greater peace of mind—knowing your property is always under watchful eyes.
For more tips and product reviews on outdoor security, explore our main hub for the latest updates and in-depth guides.
Perimeter Camera Installation Checklist
To help ensure a smooth and effective installation, use this step-by-step checklist when setting up your perimeter cameras:
- Review your property map—double-check that all vulnerable zones and entry points are marked.
- Choose optimal camera locations—prioritize areas with the greatest risk or least visibility.
- Test camera angles and field of view—temporarily mount cameras and check the live feed to ensure full coverage with minimal blind spots.
- Plan cable routes or Wi-Fi coverage—make sure wired cameras have safe, weatherproof cable runs, and wireless cameras have a strong signal.
- Install mounting hardware securely—use weather-resistant fasteners and mount cameras out of reach to deter tampering.
- Set up camera software and alerts—configure motion zones, notifications, and storage settings before finalizing installation.
- Test at different times of day—verify image quality and motion detection after dark and in varying weather conditions.
- Label camera views in your app—helpful for quick reference during alerts or emergencies.
- Document your setup—take photos and notes for future troubleshooting or upgrades.
Common Mistakes to Avoid with Perimeter Cameras
Even the best equipment can’t compensate for poor planning or installation. Watch out for these frequent mistakes:
- Ignoring blind spots—failing to cover corners, side yards, or shadowed areas can leave vulnerabilities.
- Mounting cameras too high or too low—extreme angles can distort faces or miss crucial details like license plates.
- Overlooking lighting conditions—cameras pointed into direct sunlight or poorly lit areas may produce unusable footage.
- Neglecting privacy laws—ensure cameras do not capture footage of neighbors’ yards or public sidewalks beyond what’s legal in your jurisdiction.
- Relying solely on Wi-Fi—weak signals can cause dropped footage; consider wired connections for key cameras or Wi-Fi extenders.
- Forgetting regular checks—over time, foliage growth or weather can obstruct views or damage mounts.
Careful planning and periodic reviews can help you avoid these pitfalls and maximize your security investment.
Maintaining Your Perimeter Camera System
Ongoing maintenance is crucial for reliable performance and image quality. Here’s how to keep your perimeter cameras in top shape:
- Clean camera lenses regularly—dust, spider webs, and rain spots can blur footage. Wipe lenses with a microfiber cloth every few months.
- Inspect mounts and housings—check for loose screws, rust, or cracked casings after storms or seasonal changes.
- Trim nearby vegetation—keep branches, vines, and shrubs from blocking views or triggering false alerts.
- Test motion detection and alerts—walk the perimeter monthly to ensure cameras are recording and notifications are sent as expected.
- Update firmware and apps—manufacturers periodically release security updates and new features; stay current for optimal protection.
- Check storage capacity—verify that cloud or local storage is not full and that footage is being saved properly.
- Review and adjust settings seasonally—snow, leaves, and changing sunlight may require repositioning or sensitivity tweaks.
Proactive maintenance ensures your cameras are always ready to provide critical evidence if needed.
Frequently Asked Questions About Perimeter Cameras
How many cameras do I need for a typical suburban lot?
The answer depends on your lot size, layout, and the number of vulnerable zones. Most suburban homes benefit from 4–6 perimeter cameras: one for the front yard, one for the driveway, one at each side yard, and one or two for the backyard, especially if there are alleys or multiple entry points.
Can I install perimeter cameras myself?
Many modern outdoor cameras are designed for DIY installation, especially wireless models. If you’re comfortable with ladders and basic tools, you can likely handle it yourself. For more complex systems or wired cameras, professional installation ensures optimal placement and wiring safety.
What’s the best height to mount perimeter cameras?
Generally, 8–10 feet above ground is ideal. This height provides a clear view of faces and activity while making it harder for intruders to tamper with the cameras. Avoid mounting too high, which can limit detail, or too low, where cameras are more vulnerable to vandalism.
How can I avoid false alerts from animals or passing cars?
Most modern cameras allow you to set detection zones and adjust motion sensitivity. Aim cameras away from busy streets, and trim vegetation that might trigger alerts. Some smart cameras use AI to distinguish between people, animals, and vehicles.
Is it legal to record video at my property’s perimeter?
In most areas, you can record video on your own property, including your yard and driveway. However, laws vary by state and country. Avoid pointing cameras into neighbors’ windows or private spaces, and check local regulations before installation.
How long should I keep recorded footage?
Most homeowners keep footage for 7–30 days, depending on storage capacity and personal preference. If an incident occurs, save relevant clips before they’re automatically deleted. Check your camera’s storage settings to adjust retention periods as needed.
What should I do if my camera is stolen or damaged?
If you notice a camera is missing or broken, document the damage, save any relevant footage, and report the incident to local authorities. Some camera systems offer theft replacement warranties—register your devices and check with the manufacturer for support.