
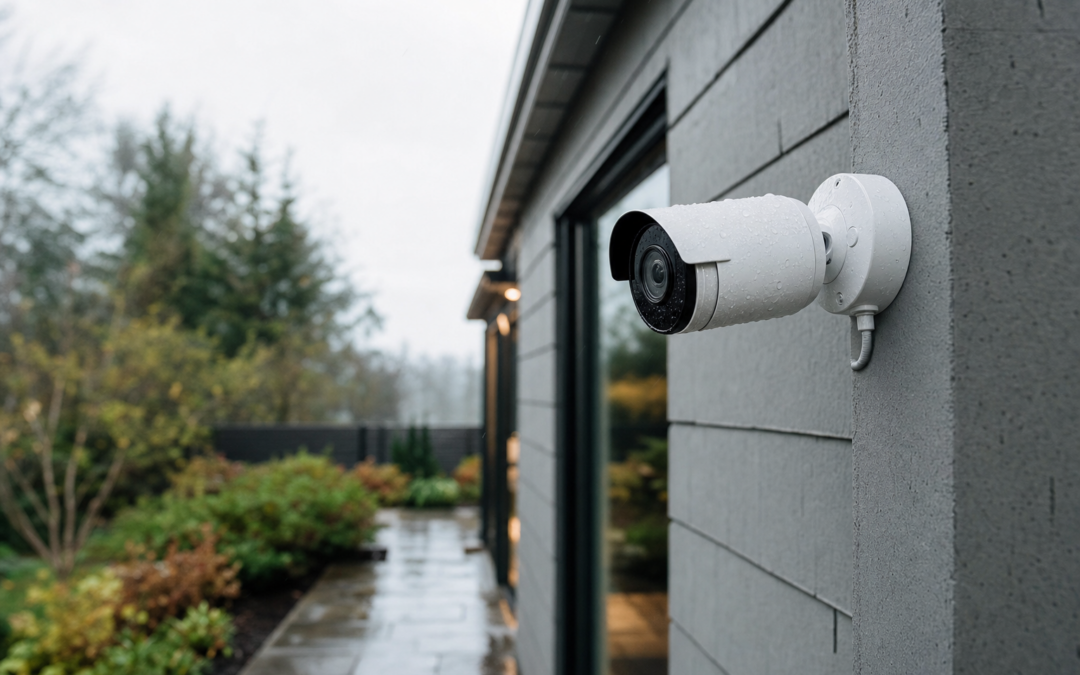
Installing outdoor security cameras is one of the most effective ways to deter intruders and monitor your property. However, even the best camera can be compromised if it’s not mounted correctly or protected from the elements. Strategic placement, thoughtful weatherproofing, and simple tweaks like minimizing glare can make a huge difference in both camera longevity and video quality.
Whether you’re a first-time DIY installer or upgrading an existing setup, understanding the basics of mounting height, cable management, and environmental factors will help you get the most out of your investment. This guide covers practical tips for outdoor camera mounting and weatherproofing, with a focus on real-world performance and reliability for US homeowners.
Why Proper Mounting Matters for Outdoor Cameras
Where and how you mount your outdoor security camera significantly impacts its effectiveness. The right height, angle, and location help maximize your field of view, minimize blind spots, and protect the camera from tampering or environmental damage. Improper mounting can also lead to issues like water ingress, foggy footage, or false alarms caused by glare and moving branches.
For a comprehensive look at outdoor security principles, including camera types and placement strategies, check out our outdoor security hub.
Choosing the Best Mounting Height and Angle
Mounting height is a critical factor for outdoor security cameras. Too low, and your camera is easy to tamper with; too high, and you might miss important facial details or license plates. The optimal height for most residential cameras is between 8 and 10 feet above the ground. This elevation strikes a balance between capturing clear details and keeping the camera out of easy reach.
- Front and Back Doors: Install cameras at 8–10 feet, angled slightly downward to catch faces and packages.
- Driveways and Walkways: Place cameras high enough to see over vehicles but low enough to capture faces and license plates.
- Perimeter Fences: Consider mounting on posts or trees facing inward, not outward, to avoid nuisance alerts from street traffic.
Always test your camera’s live view before finalizing the installation. Adjust the tilt and pan to ensure you’re capturing the intended area without excessive sky or ground in the frame.
Location Selection: Avoiding Obstructions and Hot Spots
Choose a location with a clear line of sight. Avoid mounting directly behind glass, as reflections and glare can reduce image quality—especially at night when infrared LEDs are active. Watch for nearby light sources like porch lights or street lamps, which can cause lens flare or wash out footage.
- Trim back overhanging branches and foliage that could block the camera or trigger false motion alerts.
- Keep cameras away from dryer vents or HVAC exhausts, which can fog up the lens or deposit debris.
- If possible, mount under eaves or awnings to provide natural weather protection and reduce glare from direct sunlight or rain.
Weatherproofing Essentials: Gaskets, Seals, and Ratings
Most outdoor cameras are rated for weather resistance (look for IP65, IP66, or higher), but proper installation is key to keeping moisture out. Use all included gaskets and seals when mounting the camera base to the wall. If your camera requires an external power supply or Ethernet, make sure all cable entry points are sealed with silicone caulk or weatherproof bushings.

Blink Outdoor 4 – Wireless smart security camera Review — An editorial look at this Blink option for categories — specs first, marketing second. Key figures include 4 , 53, 5 .
If mounting on brick or masonry, use anchors and ensure any drilled holes are filled with exterior-grade sealant to prevent water intrusion. For wooden surfaces, pre-drill pilot holes to avoid splitting and use rust-resistant screws.
Cable Management and Creating Drip Loops
Cable routing is often overlooked but makes a significant difference in weatherproofing and camera longevity. When running power or network cables outdoors, always create a drip loop—a downward loop in the cable just before it enters the camera housing or wall. This simple step ensures rainwater follows the curve and drips off, rather than traveling along the cable and into your electronics.
- Use UV-resistant cable clips to secure wires along walls or eaves.
- Keep cable runs as short as possible and avoid low spots where water can collect.
- For longer runs, consider using outdoor-rated conduit or cable covers for added protection.

2026 Enhanced 2K UHD Security Cameras Wireless Outdoor Review — Practical bullet cameras from realhide, summarized from hub features and listed measurements. Key figures include 24, 7, 2.13 .
Wireless cameras may still require a power cable, unless battery-operated. Always weatherproof any exposed connections with self-fusing silicone tape or shrink tubing.
Reducing Glare and Improving Night Vision
Glare, lens flare, and excessive backlighting can ruin your video footage, especially at dawn, dusk, or nighttime. To minimize these issues:
- Avoid pointing cameras directly at bright light sources such as the rising/setting sun, streetlights, or neighbors’ floodlights.
- Install the camera under an eave or use a small sunshade to shield the lens from direct sunlight and raindrops.
- Regularly clean the lens with a microfiber cloth to remove dust, pollen, or water spots, which can scatter light and reduce image sharpness.
For night vision, make sure there are no reflective surfaces (like white siding or metal railings) directly in front of the camera, as these can cause “blooming” from IR LEDs.
Securing Against Tampering and Theft
Even the best-placed camera is vulnerable if easily reachable. To reduce the risk of tampering or theft:
- Use security screws or tamper-proof mounts when possible.
- Choose locations visible enough to deter intruders but not easily accessible without a ladder.
- For high-crime areas, consider dummy cameras at eye level and real cameras higher up for redundancy.
- Label visible cameras with a warning about video surveillance to increase their deterrent effect.
Some modern cameras include anti-theft alarms or notifications if the camera is moved or disconnected.
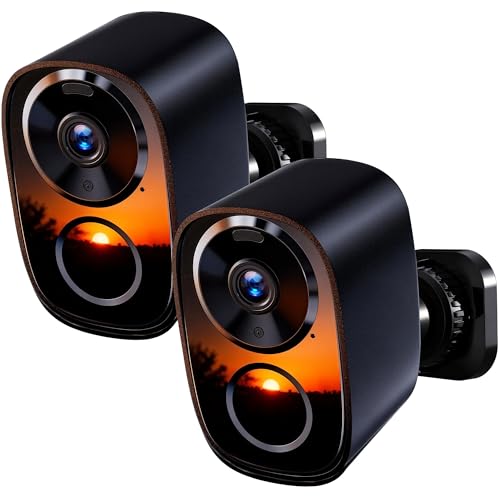
2026 Upgraded 2K Security Cameras Wireless Outdoor ( ) Review — Practical bullet cameras from realhide, summarized from hub features and listed measurements. Key figures include 3, 1 , 5 .
Power Source Considerations: Wired vs. Wireless
Outdoor cameras come in battery-powered, plug-in, and PoE (Power over Ethernet) varieties. Each has pros and cons for mounting and weatherproofing:
- Battery-Powered: Easiest to install, but you’ll need to periodically access the camera to recharge or replace batteries. Mount in a spot that’s accessible with a step ladder.
- Plug-In: Requires a nearby outdoor GFCI outlet. Use weatherproof extension cords and enclosures for any exposed plugs.
- PoE (Power over Ethernet): Single-cable solution for both power and data, but requires more planning for cable runs. Use waterproof connectors and outdoor-rated Cat5e/Cat6 cable.
Never run power cords through windows or doors, as this compromises both weatherproofing and security.
Testing Your Camera Before and After Mounting
Before tightening all screws and sealing up cable entries, test your camera’s live view in both day and night conditions. Walk through the monitored area to check motion detection and ensure you’re capturing the right zones. Adjust angles as needed before finalizing the installation.
After mounting, re-test after the first rainstorm or cold snap to check for condensation, fogging, or water intrusion. Keep an eye on your camera’s app alerts for any “offline” notifications that could indicate moisture or power issues.
Routine Maintenance for Outdoor Cameras
Even weatherproof cameras need occasional maintenance for peak performance:
- Inspect the housing and seals every few months for cracks or wear.
- Clean the lens and housing to remove dirt, spider webs, and pollen.
- Check cable connections for corrosion or loose fittings and replace as needed.
- Update firmware regularly for improved security and features.
Schedule seasonal checks—especially after severe weather events—to keep your cameras in optimal condition.
Common Mistakes to Avoid
Learning from common installation mistakes can save you time and frustration:
- Don’t mount cameras too high or too low—aim for 8–10 feet for most scenarios.
- Never leave cable entry points unsealed, as even small gaps can let in water or insects.
- Avoid placing cameras where they face direct sunlight for long periods, as this can overheat electronics and degrade the image sensor.
- Don’t ignore regular maintenance; a dirty or fogged lens can be as bad as no camera at all.
Camera Mount Options and Accessories
The right mounting hardware can simplify installation and improve weather resistance. Look for:
- Adjustable wall mounts for fine-tuning the camera angle and coverage.
- Corner mounts to cover two walls or a wider field of view.
- Junction boxes to house connections and keep them protected from rain and snow.
- Sunshades or hoods to minimize glare and protect the lens.
Always use manufacturer-approved accessories to avoid interfering with weather sealing or warranty coverage.

2026 Upgraded 2K Security Cameras Wireless Outdoor Review — An editorial look at this HITELLARCAM option for bullet cameras — specs first, marketing second. Key figures include 2026, 2, 24.
Final Thoughts: Reliable Coverage Year Round
Proper mounting and weatherproofing are essential for getting the best performance and longest lifespan from your outdoor security cameras. By choosing the right height and angle, sealing all cable entry points, and taking steps to reduce glare and environmental wear, you’ll enjoy clearer footage and fewer maintenance headaches.
For more tips on fortifying your home’s exterior and choosing the best surveillance gear, visit our outdoor security section for updated guides and expert insights.
Outdoor Camera Mounting and Weatherproofing Checklist
Before you begin installation, it’s helpful to have a checklist to ensure you don’t overlook any critical steps. Here’s a practical guide to keep your project on track:
- Choose the Right Camera: Select a camera rated for outdoor use (IP65 or higher).
- Plan Your Coverage: Walk your property and identify key entry points and blind spots.
- Test Wi-Fi Strength: Use your phone to ensure a strong signal at the mounting location.
- Gather Tools and Supplies: Drill, screwdriver, anchors, weatherproof sealant, cable clips, and a ladder.
- Check for Obstructions: Make sure the view is clear of branches, lights, and reflective surfaces.
- Mark the Mounting Spot: Use a pencil to outline where the bracket will attach.
- Install Anchors: Use the correct anchors for your wall material (masonry, wood, or siding).
- Mount the Camera: Attach with rust-resistant screws and use included gaskets.
- Seal All Openings: Apply silicone caulk around mounting holes and cable entry points.
- Create Drip Loops: Form a downward loop in every outdoor cable run.
- Secure Cables: Use UV-resistant clips or conduit to protect wiring.
- Adjust the Angle: Check the live feed and fine-tune your camera’s aim.
- Test Motion Detection: Walk through the monitored area to ensure reliable alerts.
- Review Footage at Night: Verify that IR or night vision works without glare or reflections.
- Document Your Setup: Take photos of installation and note cable routes for future reference.
Common Outdoor Camera Mounting Mistakes to Avoid
Even experienced DIYers can make errors that compromise security or cause premature equipment failure. Be mindful of these mistakes when installing your outdoor cameras:
- Ignoring Manufacturer Guidelines: Always follow the specific instructions for your camera model—especially for mounting height, angle, and weatherproofing.
- Insufficient Weatherproofing: Skipping gaskets, failing to seal holes, or leaving cable entry points exposed can lead to water damage and void warranties.
- Pointing Directly at Light Sources: Cameras aimed at porch lights, car headlights, or the rising/setting sun can suffer from constant glare and poor image quality.
- Mounting Too Low: Cameras placed within easy reach are more vulnerable to tampering or theft.
- Running Cables Without Drip Loops: This can funnel rainwater straight into your electrical connections or indoors, causing short circuits.
- Neglecting Regular Maintenance: Dirty, fogged-up, or spider-webbed lenses quickly degrade video clarity and detection accuracy.
- Overlooking Wi-Fi or Power Stability: A perfect camera placement is useless if the signal is weak or the power source is unreliable.
- Forgetting About Accessibility: You’ll need to access the camera at least once a year for cleaning or firmware updates—avoid locations that make this impossible.
Maintaining Your Outdoor Security Cameras
Ongoing maintenance is just as important as a careful installation. Regular upkeep will extend the life of your cameras and ensure you always have clear, reliable footage when you need it most.
- Clean the Lens: Wipe the lens with a microfiber cloth every few months, or more often if you live in a dusty or coastal area. Avoid abrasive cleaners which can scratch the glass or plastic.
- Inspect Seals and Gaskets: Check for cracks, gaps, or deterioration in weatherproofing materials. Reapply sealant if you notice any issues.
- Remove Debris: Clear away any leaves, spider webs, or nests that may block the camera’s view or trigger motion alerts.
- Check Mounting Hardware: Ensure screws and brackets are tight and rust-free. Replace any rusted or corroded hardware promptly.
- Test Video and Alerts: Periodically review live feeds and motion detection to confirm the camera is capturing the right area and sending notifications correctly.
- Update Firmware: Log into your camera’s app or web portal to check for and install any available software updates. These can improve security and add features.
- Monitor Battery Levels: For wireless models, set reminders to check and recharge or replace batteries as needed—especially before storm seasons.
- Inspect Cables and Connections: Look for signs of wear, fraying, or animal damage. Replace compromised cables with outdoor-rated versions.
Set a calendar reminder to perform basic maintenance at the start of each season. This proactive approach will help you catch potential problems before they affect your security coverage.
Frequently Asked Questions: Outdoor Camera Mounting and Weatherproofing
How high should I mount my outdoor security camera?
For most residential applications, 8 to 10 feet above the ground is ideal. This height captures faces and details while keeping the camera out of easy reach from passersby or potential intruders.
Do I need to use all the gaskets and seals that came with my camera?
Yes. These components are essential for weatherproofing and protecting sensitive electronics from moisture. Skipping them can void your warranty and lead to water damage over time.
Can I install an outdoor camera on vinyl siding?
Absolutely, but use specialized siding mounting blocks or brackets to avoid crushing or cracking the siding. Always seal around any holes with exterior-grade caulk to prevent leaks.
How do I prevent condensation inside the camera housing?
Condensation usually results from poor seals or rapid temperature changes. Use all weatherproofing materials, avoid pointing cameras directly at vents, and consider silica gel packets inside the housing if your model allows.
What’s the best way to hide or protect camera cables?
Use outdoor-rated conduit, cable covers, or trunking to shield cables from UV rays, rain, and animals. Always create drip loops and avoid low points where water can collect.
How often should I check or clean my outdoor cameras?
At minimum, inspect and clean your cameras with each change of season. More frequent checks may be necessary in areas with heavy pollen, dust, or insect activity.
Are wireless outdoor cameras truly weatherproof?
Most reputable brands offer weather-resistant models, but even the best-rated camera needs proper installation and sealing. Wireless models are especially vulnerable at cable entry and battery compartments, so pay close attention to gaskets and covers.
Can I install outdoor cameras myself, or should I hire a professional?
Many homeowners successfully install cameras with basic tools and careful planning. However, if you’re uncomfortable with ladders, drilling, or running cables, a professional can ensure optimal placement and weatherproofing for peace of mind.
Quick Tips for Seasonal Camera Adjustments
Outdoor conditions change with the seasons, and your camera setup may need minor tweaks to maintain optimal performance. Here are a few seasonal considerations:
- Winter: Clear snow and ice from the camera and lens. Check for condensation inside the housing after temperature swings.
- Spring: Watch for new foliage growth that could block the view. Clean away pollen buildup.
- Summer: Check for overheating issues if the camera is exposed to direct sunlight for extended periods. Ensure insect nests or webs aren’t obstructing the lens.
- Fall: Remove fallen leaves and check for increased spider activity around the camera.
Regular seasonal checks help ensure your cameras always deliver clear, actionable footage, no matter the weather.
Integrating Outdoor Cameras with Other Security Measures
While properly mounted and weatherproofed cameras are a powerful deterrent, they work best as part of a layered security approach. Consider integrating your cameras with:
- Motion-activated lights: These can startle intruders and improve night-time image clarity.
- Alarm systems: Link cameras to alarms or smart home systems for real-time alerts and automated responses.
- Warning signage: Clearly posted signs about video surveillance can prevent incidents before they occur.
- Fencing and landscaping: Use physical barriers and strategic plantings to direct traffic and reduce hiding spots.
Combining technology, lighting, and physical barriers creates a comprehensive defense for your property—maximizing the value of your outdoor security cameras.